

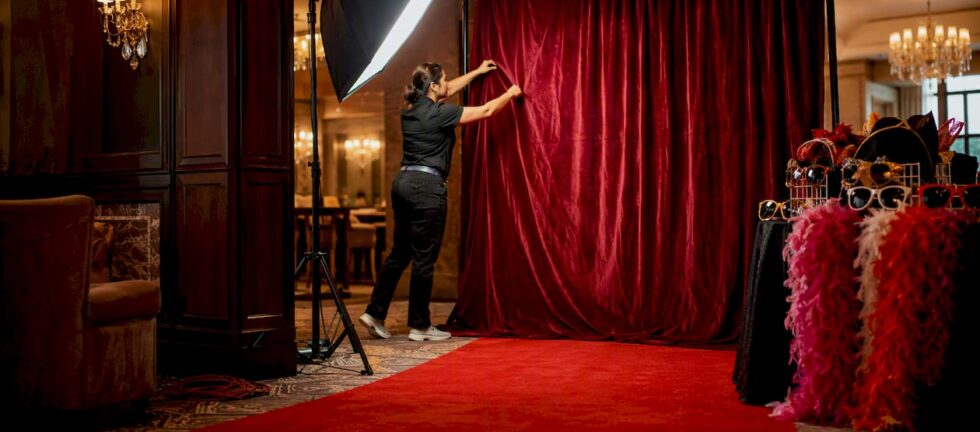
For most weddings, corporate galas, and mid-to-large social events, renting a red carpet photo booth is the right call. You get studio-grade photos, a professional attendant, reliable timing, and a polished step-and-repeat setup that guests actually want to stand in front of. DIY makes sense for small private parties where you already own decent lighting and a quality camera, or when budget is the hard constraint. Ready to book? Request a quote from ZATTU PHOTO BOOTH or follow the DIY shopping list below to build your own setup.
Key takeaways
A professional red carpet photo booth rental is the most reliable choice for events over 80 guests, branded activations, and any occasion where photo quality and guest experience are priorities.
| Point | Details |
|---|---|
| Rent for most events | Weddings, galas, and corporate events over 80 guests benefit from an attendant, studio lighting, and consistent print quality. |
| DIY works for small gatherings | Under 40 guests with a ring light, fabric backdrop, and a quality smartphone produces shareable results at lower cost. |
| Ask the right vendor questions | Confirm camera specs, unlimited prints, attendant coverage, and written inclusions before signing any rental agreement. |
| Plan your space and timing | Allow a minimum footprint and standard power outlet, and book 8–12 weeks ahead for peak Canadian seasons. |
| ZATTU PHOTO BOOTH | Owner-operated studio-grade rentals across Southwestern Ontario with flat-rate pricing and custom branding options. |
Table of Contents
- What does a red carpet photo booth rental include?
- How do you style a red carpet booth for your event?
- How to set up a DIY red carpet photo booth
- Rent or DIY? A decision checklist and vendor questions
- Venue, space, and timing for red carpet setups in Canada
- Why studio-grade equipment makes a visible difference
- When we recommend renting versus going DIY
- ZATTU PHOTO BOOTH brings studio-grade red carpet experiences to Southwestern Ontario
- Sources
What does a red carpet photo booth rental include?
A professional rental is more than a backdrop and a camera. Here is what a complete package typically covers:
- Backdrop: step-and-repeat (logo repeat), velvet curtain, or sequin drape
- Red carpet runner with stanchions and rope
- Camera and lighting: studio-grade camera body, professional softboxes or strobes
- Attendant: on-site for the full operational window
- Instant prints and/or digital delivery: unlimited or per-session, depending on the package
- Setup and breakdown: included in most flat-rate packages
- Travel fee: varies by distance from the operator’s base
Canadian rental packages generally fall into three tiers. A small private event (two to three hours, under 75 guests) runs at the lower end of the pricing scale. A standard wedding or birthday party package adds custom templates and longer hours. A corporate activation package layers in branded step-and-repeat printing, social-sharing kiosks, and GIF or boomerang output. Pricing scales with guest count, rental duration, custom branding, and whether prints are unlimited or capped.
Common add-ons worth asking about: custom step-and-repeat printing, branded photo strip templates, extra print runs, instant GIF/boomerang output, and on-site retouching.
Pro Tip: Ask for flat-rate pricing and a written inclusions list before signing anything. Verify whether prints are unlimited or per-session, and confirm whether setup and breakdown time is included in your rental window or billed separately.
Personalised photo booth experiences have shown 45% higher guest engagement compared to standard setups, which is why branded activations with custom templates are increasingly standard at corporate events.
How do you style a red carpet booth for your event?
The backdrop is the centrepiece of the whole setup, and the right choice depends on your event’s vibe and branding needs.
| Event type | Backdrop style | Props | Material notes |
|---|---|---|---|
| Wedding | White or ivory curtain drape | Feather boas, novelty sunglasses, floral frames | Fabric for soft, elegant look |
| Corporate gala | Step-and-repeat logo repeat | Branded placards, gold statuettes | Vinyl for crisp logo reproduction |
| Nightlife/birthday | Sequin or metallic curtain | Faux press microphones, oversized glasses | Sequin fabric for high-glam flash |
| School/grad | Solid colour or school crest repeat | Graduation caps, novelty signs | Vinyl or fabric both work |
A step-and-repeat (the classic celebrity photo backdrop with repeating logos) is the gold standard for corporate and branded events because every photo carries the sponsor’s mark. A velvet drape reads as luxurious and suits galas and weddings. A sequin curtain catches flash beautifully and photographs brilliantly for nightlife or milestone birthdays.
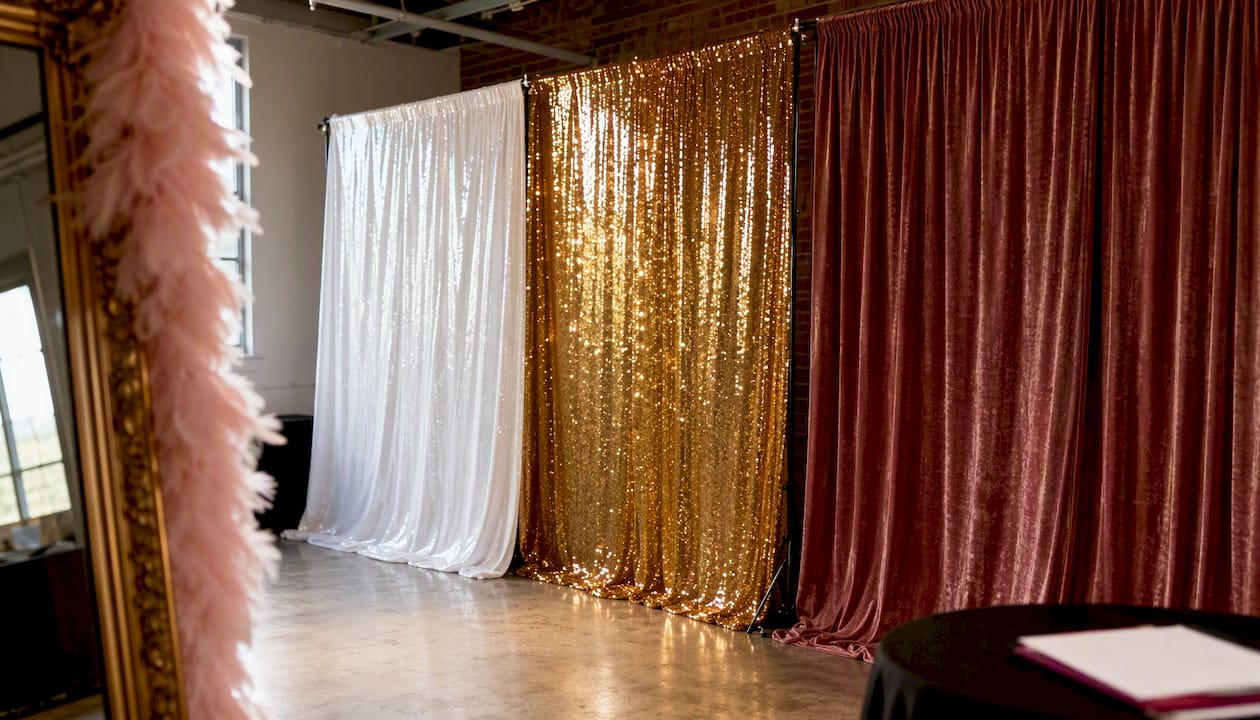
Props drive guest participation. Paparazzi cutouts, faux press microphones, and gold statuettes reinforce the celebrity theme. Feather boas and novelty sunglasses lower inhibitions and get guests laughing. Branded placards with your event hashtag or company name encourage social sharing. Backdrop-driven setups can generate substantial social impressions when guests share photos with consistent, on-brand framing.
For outdoor setups, choose vinyl backdrops over fabric. Vinyl resists moisture and holds its shape in light wind. Carpet runners should be weighted or taped at the edges on any hard surface.
Pro Tip: Add your event hashtag or Instagram handle to the photo template, not just the backdrop. Guests who share digitally carry your branding into their feeds automatically.
How to set up a DIY red carpet photo booth
If you are going the DIY route, keep the shopping list tight and the setup sequential.
Shopping list:
- Vinyl or fabric backdrop (step-and-repeat or solid colour)
- Red carpet runner (at least 6 feet long)
- Portable stanchions with rope
- Adjustable backdrop stand or gaffer tape and a sturdy wall
- Tripod
- Camera (DSLR, mirrorless, or recent smartphone with portrait mode)
- Ring light or two softboxes
- Basic props (boas, glasses, placards)
- Photo-sharing app or laptop with printing software
Step-by-step setup:
- Choose a dedicated wall or entrance with at least 8 feet of width and 7 feet of height clearance.
- Hang the backdrop at full height using a backdrop stand or secure it flat against the wall with gaffer tape.
- Roll out the red carpet runner centred in front of the backdrop and place stanchions on each side.
- Position your tripod and camera an appropriate distance from the backdrop for full-body shots.
- Set two softboxes at 45-degree angles on either side of the camera, or place a ring light directly behind the camera lens.
- Test framing in both portrait and landscape orientations before guests arrive.
- Set your white balance to match your lighting (tungsten for warm bulbs, daylight for softboxes).
- Configure your sharing or printing workflow and run at least five practice shots to confirm exposure.
A practical DIY guide from PolaroidCam recommends browser-based sharing tools for hosts who want instant digital delivery without dedicated printing hardware. For camera and lighting setup specifics, Marky Booth’s step-by-step guide covers booth types and lighting angles in detail.
The honest limit of a DIY setup: without an attendant, guest flow slows, lighting drifts as the room fills, and troubleshooting falls on the host. For events over 80 guests, that trade-off becomes noticeable quickly.
Rent or DIY? A decision checklist and vendor questions
Run through these before committing to either path:
- Guest count over 80? Rent. An attendant manages flow and keeps quality consistent.
- Corporate branding required? Rent. Custom step-and-repeat printing and branded templates need professional reproduction.
- Venue has strict power or space restrictions? Confirm with the rental operator before booking.
- Budget is the hard limit? DIY with vinyl backdrop kits (widely available on Amazon) and a ring light can work for intimate gatherings.
- You need guaranteed photo quality? Rent. A smartphone in a dim ballroom will not match a Nikon full-frame mirrorless with professional softboxes.
When you are vetting a rental operator, ask these questions directly:
- What camera body and lighting do you use?
- Is setup and breakdown included in the quoted hours?
- Is there an on-site attendant for the full rental window?
- Are prints unlimited, and what is the digital delivery method?
- Can you provide custom branded templates?
- Do you carry backup equipment?
- What is your deposit and cancellation policy?
Red flags: vague “includes everything” answers with no itemised list, no sample full-size images (not just thumbnails), no on-site attendant, and unclear post-event delivery timelines. Check vendor reviews on platforms like WeddingWire to verify reputation before booking.
Pro Tip: Request a sample full-size image file from the operator’s actual camera setup, not a compressed social media export. The difference between a tablet-based booth and a full-frame mirrorless camera is immediately visible at full resolution.
Venue, space, and timing for red carpet setups in Canada
Space planning prevents the most common day-of surprises.
- Minimum footprint: 8 feet wide by 10 feet deep for a standard step-and-repeat with stanchions and a 4-foot camera distance. Add 2 feet of depth for group shots.
- Power: most professional setups require one standard 15-amp outlet within 10 feet. Confirm with your venue before the event.
- Outdoor setups: secure the backdrop against wind, use a weighted carpet runner, and confirm the venue permits temporary structures. Check municipal permit requirements for public spaces in Ontario.
- Placement: professional operators recommend positioning the booth at high-traffic entrances or near the main reception area to maximise participation.
For timing, build your schedule around these benchmarks:
- Setup buffer: allow 60–90 minutes before guests arrive for a professional rental; 90–120 minutes for a DIY build.
- Operational window: 3–4 hours covers most weddings and corporate dinners comfortably.
- Breakdown: 30–45 minutes for a professional operator.
Book Canadian providers at least 8–12 weeks ahead for peak wedding season (May through September) and corporate year-end events (November through December).
Why studio-grade equipment makes a visible difference
The gap between a tablet-based booth and a professional camera setup shows up in every single print.
| Equipment | Benefit |
|---|---|
| Nikon full-frame mirrorless camera | Low noise, sharp detail even in low-light ballrooms |
| Professional softboxes | Even, flattering light with no harsh shadows |
| Tethered dye-sublimation printer | Fast, consistent strips with accurate colour reproduction |
| Custom backdrop stand | Wrinkle-free, stable backdrop at any venue |
A full-frame sensor captures significantly more light than a tablet camera, which matters in the dim, mixed-lighting environments common at galas and receptions. Professional softboxes eliminate the raccoon-eye shadows that ring lights can create on guests wearing glasses. Tethered printing means the attendant can catch a bad frame before it prints, rather than handing guests a blurry strip.
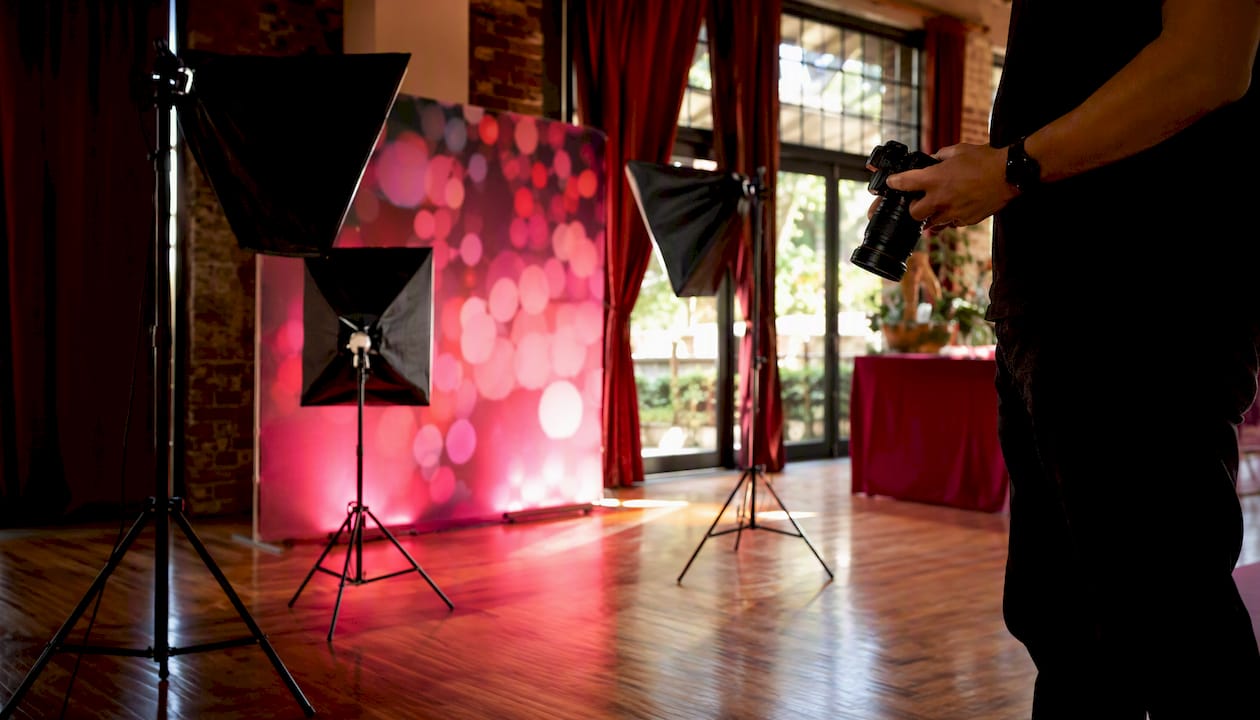
For corporate clients, consistent brand colour reproduction across every print is non-negotiable. A professional photo booth camera with calibrated colour profiles delivers that; a tablet app does not.
The owner-operated model matters here. When the person who set up the equipment is also running it, accountability is direct. There is no subcontractor who has never seen the venue before.
When we recommend renting versus going DIY
Three scenarios cover most of what we see:
Small house party (under 40 guests): DIY is genuinely viable. A fabric backdrop, a ring light, and a recent smartphone with portrait mode produce shareable photos. The savings are real, and the setup is manageable for one person.
Mid-size wedding (80–150 guests): Rent. The volume of guests, the expectation of frame-worthy keepsakes, and the need for consistent quality across a four-hour window make a professional rental the reliable choice. One attendant managing flow means you are not fielding photo questions on your wedding night.
Large corporate gala (150+ guests, branded activation): Rent, and invest in the custom step-and-repeat and branded template add-ons. The ROI on branded impressions from guest social sharing is measurable, and the photo booth engagement data supports the spend. A DIY setup at this scale creates bottlenecks and inconsistent results that reflect on the brand.
The honest trade-off: DIY gives you control and saves money. A professional rental gives you reliability and polish. For anything where the photos matter to the guests or the brand, reliability wins.
ZATTU PHOTO BOOTH brings studio-grade red carpet experiences to Southwestern Ontario
Studio-quality red carpet photos without the agency overhead. ZATTU PHOTO BOOTH brings Nikon full-frame mirrorless cameras, professional softboxes, and a dedicated on-site attendant to every event in Southwestern Ontario, so your guests get frame-worthy keepsakes and you get a stress-free evening.
We offer flat-rate packages for weddings, corporate galas, birthday parties, and branded activations, with custom step-and-repeat backdrops, branded photo templates, instant prints, and digital sharing built in. No vague inclusions, no surprise fees. Our glam photo booth and studio booth options are particularly popular for red carpet-style setups where image quality and lighting matter most.
Booking is straightforward: request a quote, confirm your date and package, and pay a deposit to hold your event. We recommend reaching out well in advance for peak-season dates. View packages and check availability to get started.
Sources
- How to Set Up a Photo Booth: Step-by-Step Guide by Marky Booth
- Top Photo Booth Trends 2026: 45% Higher Guest Engagement
- Red Carpet Backdrop