


A properly configured photo booth is an event-ready lead-generation channel. When you pair short on-screen forms with instant digital delivery and CRM automation, guests exchange contact details willingly — and your follow-up starts before they leave the room. ZATTU PHOTO BOOTH builds every activation around this principle, making it a ready-to-execute partner for Canadian events governed by PIPEDA.
Quick setup checklist:
- Define two to three qualifying fields before the event
- Map those fields directly to your HubSpot or Salesforce instance
- Trigger photo delivery within 60 seconds of capture
- Follow up with a personalised email within the first hour
- Track capture rate and opt-in rate as your primary KPIs
Corporate activations with optimised UX report 70–80% opt-in rates — a benchmark worth building your event strategy around.
Table of Contents
- Why photo booths convert better than passive lead capture
- Your 7-step checklist for photo booth data capture lead generation
- How the data actually flows from booth to CRM
- Which booth format works best for capturing leads?
- Automate before, during, and after your event
- Data privacy and Canadian compliance (PIPEDA and CASL)
- How to measure whether your booth activation actually worked
- ZATTU PHOTO BOOTH corporate gala activation: what the numbers looked like
- Key takeaways
- Why we build every booth around lead capture
- Ready to turn your next event into a lead pipeline?
- Further reading and sources
Why photo booths convert better than passive lead capture
Guests at a photo booth are already engaged, already smiling, and already invested in getting their photo. That emotional state makes them far more willing to share contact details than a guest who is handed a badge scanner or a clipboard. The exchange feels fair: you give us your email, we send you a stunning keepsake.
Photo booth activations that integrate lead capture into the experience produce higher-value leads and measurable post-event pipeline. Behavioural signals reinforce this: time spent in the booth, immediate social sharing, and creative choices all indicate genuine interest, and those signals can feed directly into your lead-scoring rules.
One hospitality operator reported a high opt-in rate after prompting guests with a short form tied to photo delivery. When the UX is right, form completion can be very high.
Your 7-step checklist for photo booth data capture lead generation
A well-run activation follows a clear sequence. Hand this list to your vendor or event staffer before the doors open.
- Define your goal and qualifying fields. Choose two to three fields maximum: first name, email, and one qualifying question (company name for B2B, postal code for B2C).
- Map CRM fields. Confirm field names in HubSpot or Salesforce match exactly what the booth software will send.
- Build your automation. Create the photo-delivery trigger, the welcome email, and the sales-alert workflow before the event.
- Test end-to-end. Run a full test capture 48 hours out: submit a form, confirm the photo arrives, verify the lead appears in the CRM with the correct tags.
- Set up signage and staffing scripts. Post clear consent language at eye level. Brief staff on the two-sentence pitch that encourages opt-in.
- Activate QR and SMS fallbacks. If a guest misses the on-screen form, a QR code linking to a short landing page captures them anyway.
- Verify and route post-event. Run email validation on the list within 24 hours, remove duplicates, and push verified leads into the appropriate nurture stream.
Pro Tip: Use the breadcrumb technique: ask for first name on screen one, then email on screen two. Starting with low-stakes data before requesting contact details measurably reduces form abandonment.
How the data actually flows from booth to CRM
Choose a native integration where one exists; otherwise use secure webhooks or a middleware platform like Zapier or Make with validation steps built in.

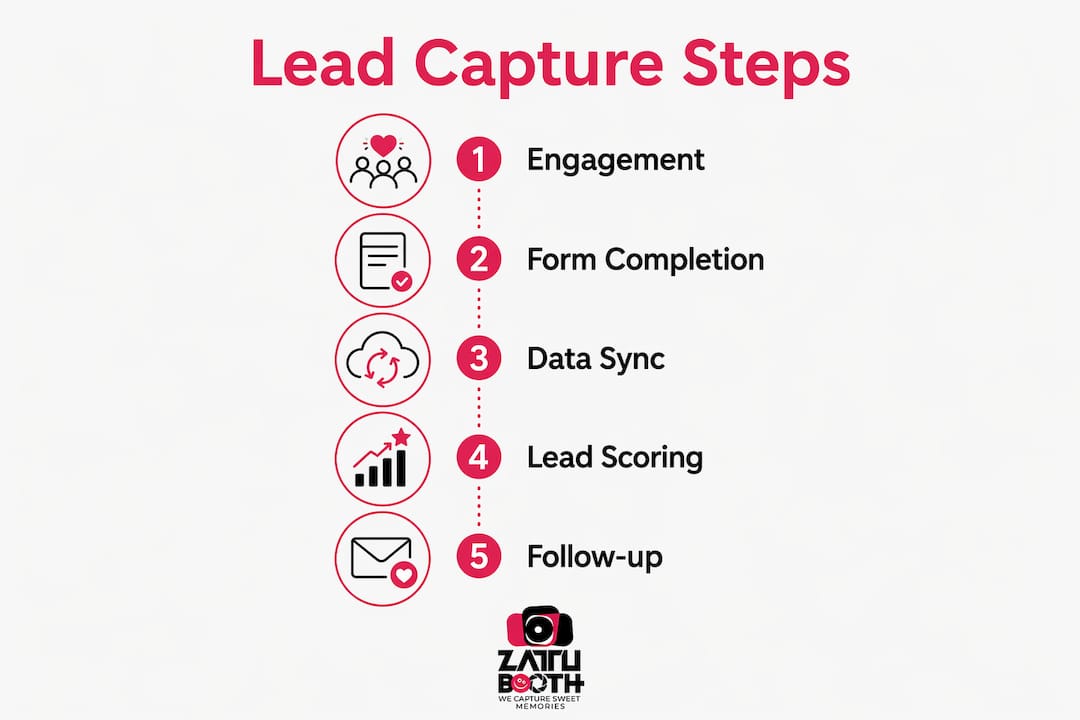
The pipeline has three stages. First, capture: the guest completes the on-screen form (email, SMS entry, QR scan, or social sign-on). Second, enrich: automated email validation blocks typos and disposable addresses in real time, and optional firmographic append adds company data for B2B events. Third, sync and route: validated fields push to your CRM, lead-scoring rules fire, and high-intent leads trigger an immediate sales notification.
| Integration pattern | Typical latency | Reliability notes |
|---|---|---|
| Native CRM connector | Under 30 seconds | Highest reliability; no middleware failure points |
| Webhook (direct) | Under 60 seconds | Reliable; requires server-side validation |
| Middleware (Zapier/Make) | 1–5 minutes | Flexible; add a validation step to catch errors |
Pro Tip: Store behavioural context alongside contact data. Booth signals like sharing actions and dwell time are valuable scoring inputs — pass them as custom CRM fields so sales sees intent, not just a name and email.
Which booth format works best for capturing leads?
Pick the format that balances dwell time with guest throughput. Higher dwell time generally means more data captured per guest, but a slow-moving queue kills participation.
- Studio booth (ZATTU’s Nikon full-frame setup): high image quality drives strong share motivation; moderate dwell time suits galas and corporate events where guests linger. Opt-in rates are consistently strong when the photo quality is visibly superior.
- Mirror booth: high engagement and a theatrical experience encourage guests to stay longer. Works well for photo booth engagement at galas and award nights. Throughput is moderate.
- Glam booth: beauty lighting and polished output appeal strongly at weddings and charity galas. Guests are motivated to share, which reinforces the opt-in ask.
- Roaming booth: high volume, low form completion. Best for brand awareness at large trade shows; pair with a QR fallback to recover leads from guests who skip the form.
- iPad/self-serve station: fast and low-footprint. Needs a well-optimised two-field form and clear signage to perform. Good for high-traffic conferences. Consider trade show booth layout when placing these stations for maximum sightlines.
- AI/AR booth: novelty drives social sharing and repeat visits to the booth. Excellent for product launches. Opt-in rates benefit from the “I want to see my AI photo” motivation.
Automate before, during, and after your event
Automate immediate delivery and instant sales notifications to capture momentum while guests are still on-site.
Before the event: build your email templates, confirm CRM field mapping, set lead-scoring thresholds (e.g., 80+ points routes to sales immediately), and test every trigger.
During the event: photo delivery fires within 60 seconds via email or SMS. A welcome message lands in the guest’s inbox before they reach the next table. Instant sales notifications alert your team when a high-intent lead (requested a demo, shared immediately on social) hits the threshold.
After the event: run list verification, segment by captured responses, and launch differentiated nurture streams. Guests who opted into marketing receive a personalised follow-up; those who did not enter a softer content sequence.
Pro Tip: Keep your immediate delivery email to three elements: the photo, one sentence of brand context, and a single CTA. Every additional element reduces click-through.
Data privacy and Canadian compliance (PIPEDA and CASL)
Collect consent explicitly and visibly. Every capture record should include a timestamp and the method of consent.
What to display on-screen and on signage:
- Purpose: “We collect your email to send your photo and, with your permission, occasional updates from [Brand].”
- Retention: “Your data is stored for 12 months and then deleted.”
- Contact: “Questions? Email [email protected].”
Sample PIPEDA/CASL consent text for marketing opt-in:
“Yes, I agree to receive marketing emails from [Brand]. I can unsubscribe at any time. My information will not be shared with third parties.”
Compliance checklist:
- Consent captured on-screen with a clear checkbox (pre-ticked boxes do not satisfy CASL)
- Secure transmission (HTTPS/TLS) between booth and server
- Written data retention and deletion policy
- Access controls limiting who can export the lead list
- Documented breach response plan
Pro Tip: Store consent metadata (date, time, opt-in method) as a dedicated CRM field on every lead record. If a contact later disputes their opt-in, you have a timestamped record.
How to measure whether your booth activation actually worked
Track capture rate, opt-in rate, verified lead rate, cost-per-lead, and conversion rate from captured lead to qualified opportunity. These five metrics tell you whether the booth delivered pipeline, not just foot traffic.
| KPI | Definition | Target benchmark |
|---|---|---|
| Capture rate | Leads captured ÷ total booth interactions | 60%+ |
| Opt-in rate | Marketing opt-ins ÷ total captures | 70–80% (corporate activations) |
| Verified lead rate | Valid emails ÷ total captures | high with real-time validation |
| Cost-per-lead | Total activation cost ÷ verified leads | Varies by event type |
| Pipeline conversion | Qualified opportunities ÷ verified leads | Track over several weeks |
ROI is best calculated by multiplying your conversion rate from captured leads by your average deal value, not by counting raw opt-ins.
Suggested A/B tests: incentive type (print vs. digital delivery), form length (two vs. four fields), delivery channel (SMS vs. email), and CTA wording on the consent screen.
Pro Tip: Run your first A/B test on form length. Two fields consistently outperform four in throughput; the question is whether the extra qualifying data from four fields is worth the drop in volume for your specific event.
ZATTU PHOTO BOOTH corporate gala activation: what the numbers looked like
A ZATTU PHOTO BOOTH corporate gala activation in Southwestern Ontario turned a high-attendance evening into a measurable pipeline source. The setup used a Nikon full-frame mirrorless camera, professional studio lighting, and a custom branded backdrop. A two-field on-screen form (first name, work email) fed directly into the client’s HubSpot instance via webhook, with email validation active at the point of capture.
A 70–80% opt-in rate was reported among attendees using the booth, with verified leads delivered to sales the same evening.
The client’s sales team received real-time Slack notifications for guests who shared their photo immediately — a high-intent signal that triggered a personalised follow-up within 30 minutes. The studio-grade equipment produced images guests genuinely wanted to share, which is what drove participation above the 70% threshold.
Key takeaways
A photo booth becomes a reliable lead-generation channel when you combine short forms, real-time CRM sync, and PIPEDA-compliant consent into a single, well-staffed activation.
| Point | Details |
|---|---|
| Opt-in rates are achievable | Corporate activations with optimised UX report 70–80% opt-in rates. |
| Form design drives completion | Use the breadcrumb technique: name first, email second, to reduce abandonment. |
| Automate before the event | Build CRM field mapping, scoring rules, and delivery triggers before doors open. |
| Compliance is non-negotiable | PIPEDA and CASL require explicit consent, secure transmission, and a retention policy. |
| ZATTU PHOTO BOOTH delivers this | ZATTU’s owner-operated activations in Southwestern Ontario include CRM integration, studio-grade gear, and PIPEDA-conscious workflows. |
Why we build every booth around lead capture
Most event vendors think about the photo first and the data second. We think about them together, because a stunning image that disappears into a guest’s camera roll does nothing for your pipeline. The photo is the incentive; the capture is the point.
At ZATTU PHOTO BOOTH, we use Nikon full-frame mirrorless cameras and professional lighting because image quality is what motivates guests to opt in. When someone sees a genuinely beautiful photo of themselves, they want it — and they are happy to share their email to get it. That motivation is the engine of the whole system.
Our flat-rate pricing means you know the full cost before you sign anything. Our owner-operated model means the person who set up the booth is the person troubleshooting it if something goes wrong at 8 PM. And our pre-event testing protocol — full end-to-end test 48 hours out — means the CRM sync is confirmed before your guests arrive.
Ready to turn your next event into a lead pipeline?
ZATTU PHOTO BOOTH offers turnkey activations that implement everything in this guide: studio-grade equipment, CRM integration (HubSpot, Salesforce, or webhook), PIPEDA-compliant consent flows, and on-site staff support. Flat-rate pricing means no surprises on the invoice.
Whether you need a glam booth for a gala, a selfie station for a conference, or a full corporate activation package, we configure the capture workflow to match your CRM and your event goals. Tell us your venue, your expected attendance, and the two or three fields you want to capture — we handle the rest.
Request a quote and we will confirm availability and walk you through the setup in one short call.
Further reading and sources
These are the sources and tools that informed this guide.
- Brand Activation Photo Booth ROI: 5 Steps To Capture Leads — practical framework for treating a booth as a lead funnel, including opt-in benchmarks and ROI calculation method.
- Event Lead Capture 101: Sync Photo Booths With Your CRM — covers native CRM integration, real-time lead scoring, email validation, and behavioural routing.
- Photo Booth Data Capture: How Ole Red Grew Its Database — hospitality case study showing 89% opt-in rate with a short post-capture form.
- Lead Capture Strategy for Websites — source for the breadcrumb technique and progressive profiling in form design.
- OrbitForms Lead Capture Strategy Guide — broader qualification-focused framework useful for scoring and routing design.
- Trade Show Booth Design with the Right Furniture — layout and sightline guidance for high-traffic activations.