

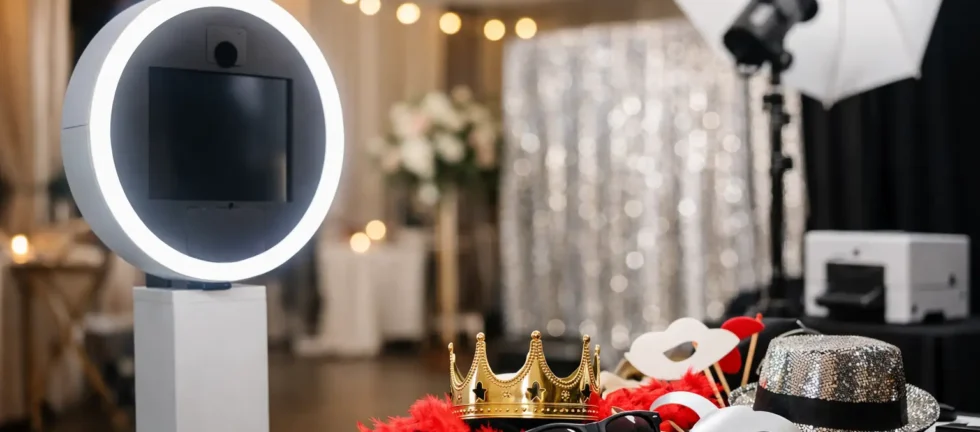
A photo booth placed beside the dinner tables may look convenient on a floor plan, but it can become a missed opportunity once music starts, servers move through the room, and guests have nowhere to gather. A thoughtful event photo booth setup guide starts with more than choosing a backdrop. It considers how guests enter the space, how they look in photos, and how the booth supports the atmosphere you worked hard to create.
For weddings, galas, company parties, and private celebrations, the best booth setup feels effortless to guests because the details were handled well before they arrived. Here is what hosts and planners should consider when creating a photo booth experience that looks polished, runs reliably, and produces keepsakes worth taking home.
Start With the Right Booth Location
The booth should be visible enough to invite participation without interrupting the main moments of the event. A tucked-away corner can keep it out of the way, but if guests cannot see it, they may forget it is there until the last hour. On the other hand, a booth directly beside the dance floor can create congestion, unwanted movement in photos, and a difficult environment for guests trying to use it.
A position near the cocktail area, reception entrance, lounge, or edge of the dance floor often works best. Guests can spot the booth naturally, yet the line stays clear of dining service and key pathways. At a wedding, consider where guests will be during cocktail hour and after dinner. At a corporate event, place it near the social hub rather than beside registration, where people are focused on arrival and check-in.
Think about the background beyond the backdrop, too. A booth can look beautiful from the front while its queue spills into a service corridor or blocks a venue doorway. Leave room for guests to approach, pose, review their photos, and collect prints without creating a bottleneck.
Plan Enough Space for More Than the Backdrop
A backdrop may only occupy a small portion of the room, but a professional photo booth needs a real working footprint. Camera distance, lighting stands, the print station, props, and guest flow all require space. Trying to compress the setup into a narrow alcove often leads to crowded photos and an uncomfortable experience.
As a practical starting point, reserve an area around 10 by 10 feet, with additional space preferred for larger backdrops, group photos, or high-traffic events. Ceiling height matters as well. Lighting can be positioned carefully in lower-ceiling venues, but a room with very low ceilings or exposed fixtures may limit certain backdrop and lighting options.
Do not assume an empty-looking area is available until the venue confirms it. Ask whether the space will later hold a bar, gift table, catering station, coat check, or vendor equipment. A clear setup area on the final floor plan prevents last-minute compromises.
Protect the Guest Experience With Clear Access
Photo booths are most successful when they welcome groups, not just individual guests. Leave enough open space for friends to wait nearby and for guests using mobility aids to access the booth comfortably. If a line is expected, orient it along a wall or open perimeter rather than across the room.
For formal events, the booth should also complement the visual standard of the room. Hide cables professionally, keep cases and supplies organized, and avoid positioning equipment where it distracts from floral installations, stage décor, or sponsor displays.
Confirm Power, Load-In, and Venue Rules Early
A photo booth relies on dependable power, especially when it includes studio strobes, a professional camera, an instant printer, and digital sharing equipment. The ideal outlet is dedicated, nearby, and known to be working. Running long extension cords across guest pathways is not a professional solution and can create safety concerns.
Before event day, confirm the outlet location, the load-in entrance, elevator access, parking instructions, and setup timing. Historic venues, hotel ballrooms, outdoor tented events, and multi-level spaces can each create different challenges. An owner-operated provider will ask these questions in advance because setup should be complete before the first guest arrives, not while your reception or program is underway.
Outdoor booths require an even more careful plan. Shade, weather protection, stable ground, access to power, and a backup location all matter. Bright sun can create harsh shadows and make screens harder to view, while wind can affect backdrops and props. An outdoor booth can be fantastic, but it should never depend on good weather alone.
Prioritize Professional Lighting and Camera Quality
Not all photo booths deliver the same result. A tablet-based booth may be suitable for a casual gathering, but it often struggles in dim ballrooms, mixed lighting, and large group shots. If the event is meaningful enough to document, image quality should be part of the decision.
Professional photo booth lighting creates flattering, consistent images regardless of whether the venue is lit with chandeliers, colored uplighting, or a dark dance-floor atmosphere. Three-point strobe lighting helps define faces, reduce unflattering shadows, and keep groups evenly exposed. A high-resolution camera and professional lens preserve detail that guests can see in both prints and digital files.
This is especially valuable for evening weddings, formal galas, and brand-conscious corporate events. A booth should not produce grainy, poorly lit images simply because the room becomes darker after dinner. The technical setup affects how confident guests feel stepping in front of the camera and whether they keep the print after the event.
Design the Backdrop, Props, and Prints as One Experience
The backdrop sets the visual tone, but it should work with the print design rather than compete with it. A dramatic floral wall, clean shimmer backdrop, custom branded panel, or themed installation can all work beautifully when the colors and style reflect the event.
For weddings, a refined neutral backdrop often gives guests more flexibility in what they wear and keeps photos timeless. For holiday parties or birthdays, a more playful option may suit the energy of the celebration. Corporate hosts should consider whether logos, campaign colors, or event messaging belong on the backdrop, print template, or both. There is a trade-off: heavy branding can increase visibility, while a more understated design can make guests more likely to display the photos later.
Props deserve the same restraint. Well-chosen props encourage interaction and fit the theme. Too many low-quality novelty items can make a premium event feel cluttered. Keep the selection clean, fun, and easy to use, with options that work for both reserved guests and the energetic groups who arrive later in the night.
Make the Print Template Worth Keeping
An instant print is not just a giveaway. It is a small piece of event design that guests will take home, place on a fridge, or save in a memory box. Include the event date, names, or company branding in a way that feels intentional. Choose readable type, a balanced layout, and colors that reproduce well in print.
A professional provider can help refine the template before the event so there are no surprises in the final output. This level of customization is particularly valuable for weddings, fundraisers, and corporate activations where every guest touchpoint represents the host.
Build a Timeline That Encourages Participation
A booth can be ready for the full event, but the highest participation usually happens during specific windows. Cocktail hour works well when guests are arriving and socializing. After dinner, the booth becomes a natural activity while the dance floor builds. During a gala, opening it after speeches can redirect guests into a more relaxed part of the evening.
Make an announcement if the booth is an important feature, especially for a larger event. A brief mention from the DJ, emcee, or event host can turn a quiet first hour into a steady flow of guests. If instant prints are available, placing one at each table or displaying a sample near the booth can also create curiosity.
For long events, ask whether an attendant will remain on-site. A staffed booth keeps props organized, helps guests, monitors print supplies, and resolves small issues before they affect the experience. The difference is noticeable when the room is busy.
Choose a Provider Who Owns the Details
The most attractive booth setup still depends on reliable execution. Ask what camera and lighting system will be used, whether an attendant is included, how customization is handled, and whether pricing covers delivery, setup, prints, digital galleries, and teardown. Transparent answers protect you from surprise charges and vague promises.
Zattu Photo Booth approaches setup as part of the guest experience, pairing studio-grade equipment with thoughtful placement, custom design, and on-site support. For hosts planning celebrations across Ontario, that means less time managing vendors and more confidence that every guest will have a reason to step into the frame.
A great photo booth does not need to dominate the room to be remembered. Give it the right location, enough room to work, lighting that flatters every guest, and a team prepared for the details. The result is a lively corner of your event where people make the kind of memories they will still be sharing long after the last song.