


The most effective digital photo booth gallery is a short, sequenced visual story — not a raw file dump. Curate it into four stages (Arrival, Social Middle, Peak Energy, Soft Landing), select a tight set of hero shots, and deliver a branded gallery link within a clear turnaround window. Guests engage more, hosts walk away with reusable marketing assets, and the master archive stays protected.
The minimum steps that make it work:
- Enable QR or link-based sharing before guests arrive
- Run a live moderation queue during the event
- Complete a three-pass edit within a couple of days after the event
- Publish a branded, mobile-optimised gallery and deliver final downloads within about one to two weeks
- Archive master files separately from the public-facing gallery
What you get: higher guest engagement during the event, frame-worthy keepsakes guests actually download, and a library of polished images ready for social, sponsor decks, or print.
Table of Contents
- What is a digital photo booth gallery, and when should you curate live vs. post-event?
- How to sequence your gallery as a four-stage visual story
- A step-by-step curation workflow your team can actually follow
- How to present the gallery so guests actually engage with it
- Which platform features matter most for Canadian event planners?
- Privacy, consent, and data retention: what Canadian hosts need to know
- How to repurpose gallery assets after the event
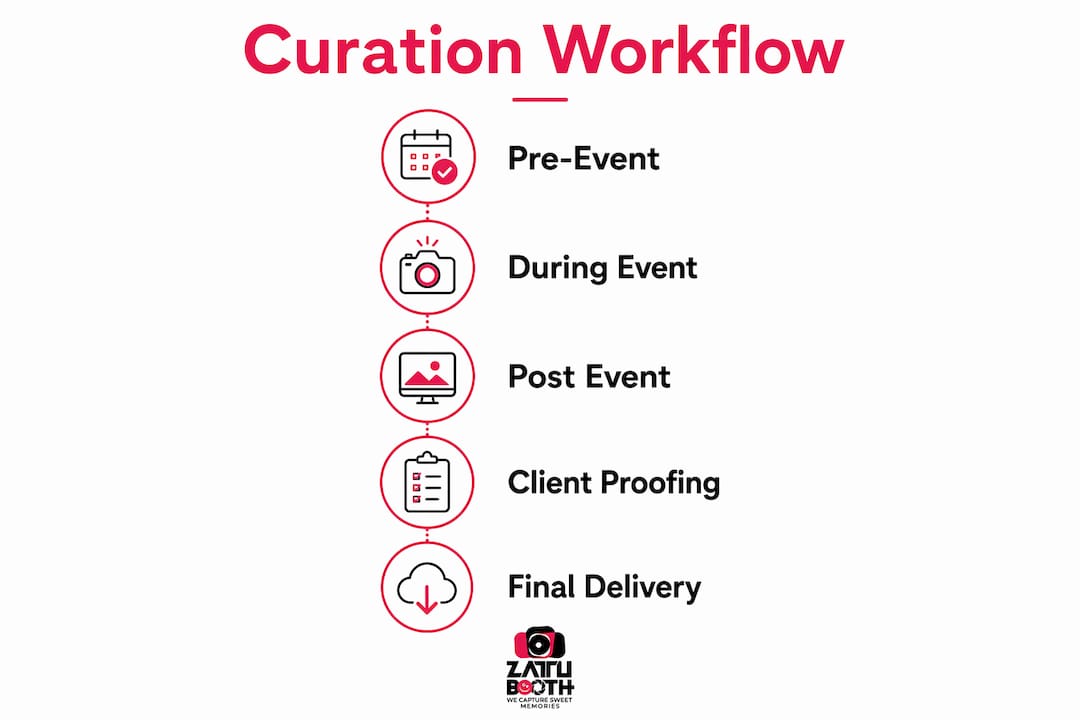
- Pre-event, during-event, and post-event: your curation timeline
- ZATTU PHOTO BOOTH delivers the full curation playbook, not just the booth
- Key takeaways
- Why the edit-first approach produces better results
- Useful sources
What is a digital photo booth gallery, and when should you curate live vs. post-event?
A digital photo booth gallery is a central, real-time hub where guests view, download, and share images instantly via QR codes or direct links. Modern platforms include live grids, logo and colour customisation, hashtag overlays, moderation tools, and basic lead capture — all accessible from a phone without downloading an app.
Live curation serves a different purpose than post-event editing. During the event, the goal is participation: a projected live feed or in-room slideshow makes guests feel like stars the moment they step out of the booth. Low-friction QR uploads and instant downloads keep energy high. Moderation at this stage is light-touch — flag obvious failures, approve borderline shots, and keep the feed moving.
Pro Tip: Brief your on-site attendant to moderate the live feed every 10–15 minutes. A single blurry or unflattering image on a projected screen can deflate the room faster than a technical glitch.
Post-event curation is where the real storytelling happens. This is when you edit for narrative arc, remove duplicates, select hero shots, and prepare assets for print or marketing. Hosts who collect first and curate second consistently produce better keepsakes than those who print directly from raw uploads.
Set expectations before the event starts. Clear signage explaining whether the gallery is public or private, how images may be used, and how guests can opt out prevents confusion and protects everyone involved.
How to sequence your gallery as a four-stage visual story
Sequencing transforms a gallery from a random feed into something guests want to scroll through twice. The four-stage framework recommended by event curators gives every gallery a natural emotional arc.
- Arrival / Anticipation: First looks, venue details, guests signing in or finding their seats. These images set the scene and ground the viewer in the event’s atmosphere.
- Social Middle: Groups forming, props being grabbed, candid laughter between friends. This is the connective tissue of the gallery — the images that make people tag each other.
- Peak Energy: The dance floor, the toast, the big group shot, the moment everyone remembers. Place your strongest hero shots here. These images carry the most emotional weight and should be given room to breathe.
- Soft Landing: Quiet end-of-night moments, couples, small groups, the last few frames before the lights come up. A gallery that ends here feels complete rather than abrupt.
Pacing matters differently for digital vs. print. Digital galleries need immediacy — bold cover images, fast thumbnails, and minimal text. Print albums need breathing room and white space so pages don’t feel cramped. Tag or timestamp uploads at capture so images can be sorted into the four stages automatically or manually during the post-event edit.

A step-by-step curation workflow your team can actually follow
The three-pass editing system is the most reliable way to reduce noise and arrive at a tight final gallery.
- First pass — triage: Remove technical failures (blurry, overexposed, eyes closed), exact duplicates, and any image that raises a consent concern. Work fast; don’t deliberate.
- Second pass — grouping: Cluster remaining images by moment or group. Within each cluster, remove the weakest variations. You want one strong capture per moment, not five nearly identical frames.
- Third pass — hero selection and sequence: Pick the best image from each cluster, assign it to one of the four narrative stages, and arrange the final sequence. Limit hero shots to a number appropriate for the event scale — a two-hour party typically needs a moderate number of final images.
Roles and timing matter. Assign a during-event moderator (approves the live feed), a post-event editor (runs the three passes), and a client approver (signs off before the gallery goes public). The editor should complete the first passes promptly while the event is still fresh. The client approver should be allowed a short proofing window before final delivery.
Selection criteria to apply in every pass: sharpness, correct exposure, genuine expression, strong composition, and uniqueness within the set. For print, tighten further — a cramped print album loses impact fast.
Pro Tip: Use a proofing or draft mode so the client sees the gallery before it goes live. One round of client feedback before publishing saves multiple rounds of edits after.
Keep deliverable rules consistent: label files by stage and export in three sizes (web at 1,200px, social at 1,080px square, print at full resolution). Store master files in at least two locations and document your archive retention policy before the event, not after.
How to present the gallery so guests actually engage with it
Mobile-first is non-negotiable. Most guests will open the gallery link on their phone within minutes of leaving the booth. A bold hero image at the top, minimal text, fast-loading thumbnails, and a clearly labelled download button are the four elements that determine whether a guest downloads their photo or abandons the page.
Design the digital gallery for energy and speed; design the print album for pacing and white space. The two formats serve different viewing contexts and should never be treated as the same product.
For layout, use white space deliberately. Limit the number of images per page, vary sizes occasionally with a full-bleed hero spread, and avoid dense grids that make every image feel equal. A gallery where nothing stands out is a gallery guests forget.
For in-venue projection, set slide intervals between 4–6 seconds — fast enough to feel alive, slow enough for guests to recognise faces. Keep the moderation queue active so nothing embarrassing hits the big screen. Platforms that support live feed displays optimised for cell connections load quickly even in venues with crowded Wi-Fi, such as those offered by The Slate Space.
Navigation features like hashtag filtering, date/time grouping, and a favourites button give guests a reason to return to the gallery after the event. That return visit is when downloads and social shares happen.
Which platform features matter most for Canadian event planners?
Not every gallery platform is built for the demands of a live event. Prioritise these capabilities when evaluating options:
- QR / link upload: Guests must be able to access the gallery without downloading an app.
- Live feed and moderation queue: Real-time display with approval controls before images go public.
- White-label branding: Logo, colour palette, and custom URL so the gallery feels like part of the event.
- Secure downloads and password protection: Guests get their images; uninvited visitors don’t.
- Auto-expiry with reminders: Auto-expiry and archive policies manage bandwidth and create urgency for downloads. Send guests a reminder before the link closes.
- Analytics: Track downloads, shares, and favourites to measure engagement and demonstrate sponsor value.
CDN-backed delivery and mobile optimisation are table-stakes for Canadian events where guests arrive on a mix of devices and network conditions. Automated sync tools that connect storage folders (Dropbox, Google Drive, OneDrive) to branded client galleries reduce manual upload steps significantly.
Pro Tip: Enable a draft or proofing mode before the gallery goes live. It costs nothing and prevents the one image you missed from becoming the one everyone screenshots.
For feature selection guidance, choosing the right booth setup is as important as choosing the right platform — the two decisions are connected.
Privacy, consent, and data retention: what Canadian hosts need to know
Canadian privacy norms require clear, visible communication before guests upload or appear in a shared gallery. Post signage at the booth entrance that states whether the gallery is public or private, how images may be used, and how a guest can request removal. Plain language works better than legal boilerplate.
Practical consent is simple: tell guests what you’re doing with their images before they step in front of the camera. A short notice at upload and an opt-out path are the two things that matter most.
For lead capture, platforms that collect names, emails, or phone numbers at upload trigger CASL considerations. Keep opt-in language explicit and separate from the image download flow — pre-ticked boxes and bundled consent don’t meet the standard.
Retention and access: use platforms that support auto-expiry and store master files separately from the public gallery. Document how long images will be held and communicate that timeline to guests. Deliver a final archive to the client, then follow your stated retention schedule. When a guest requests removal, act on it promptly and confirm in writing.
How to repurpose gallery assets after the event
A well-curated gallery is a content library, not a one-night keepsake. The primary repurposing paths for most Canadian event planners are:
- Instagram and TikTok short edits: Select 6–10 hero shots or a 15–30 second highlight clip. Export at 1,080px square for static posts and 1,080 x 1,920px for Stories and Reels.
- Event highlight reels: Combine the best booth captures with any event videography footage for a 60–90 second recap clients can share or embed.
- Sponsor deliverables: Curate sponsor-relevant hero shots where branding is visible and agreed upon. Deliver as a separate labelled folder with a short usage note.
- Print albums and keepsakes: Use the final curated sequence and export at full resolution. Confirm bleed and trim requirements with your print vendor before sending files.
Pro Tip: Deliver the final ZIP with three clearly labelled folders: Web, Social, and Print. Clients who receive organised files use them. Clients who receive a single unlabelled folder rarely do.
Archive the master files internally with a consistent naming convention (event name, date, stage) and document the retention period before closing the project.
Pre-event, during-event, and post-event: your curation timeline
| Phase | Task | Owner | Timing |
|---|---|---|---|
| Pre-event | Generate QR codes, configure branding, set moderation rules, post consent signage, run test uploads | Booth operator | a couple of days before |
| Pre-event | Brief on-site attendant on moderation intervals and live feed settings | Event planner | Day before |
| During event | Monitor live feed every 10–15 minutes, approve uploads, prompt guests at the booth | On-site attendant | Throughout event |
| During event | Collect last-minute uploads, confirm all images are syncing | Booth operator | Final 30 minutes |
| Post-event | Complete first and second curation passes, flag images for client review | Post-event editor | within about one to two days |
| Post-event | Client proofing window | Client approver | a couple of days |
| Post-event | Final sequence, export (web / social / print), deliver branded gallery link and ZIP | Post-event editor | within about one to two weeks |
| Post-event | Archive masters, document retention period, send expiry reminder to guests | Booth operator / planner | Before gallery link closes |
Understanding what a photo booth rental includes before you book helps you assign these tasks accurately and set realistic client expectations from day one.
ZATTU PHOTO BOOTH delivers the full curation playbook, not just the booth
Planners in Southwestern Ontario who want studio-quality images and a managed gallery workflow don’t have to build the process from scratch.
ZATTU PHOTO BOOTH pairs Nikon full-frame mirrorless cameras and professional lighting with a white-label gallery setup, live feed projection, moderation support, and an edit-first delivery workflow. Every booking includes a consultative process, flat-rate pricing with no hidden fees, and a clear turnaround commitment so you know exactly when the final gallery lands in your client’s inbox. Whether you’re planning a wedding, a gala, or a corporate activation, the equipment and the process are ready. Request a quote or ask for a sample timeline and portfolio at zattuphotobooth.ca/party-photo-booth-rental — and bring the fun.
Key takeaways
A well-curated digital photo booth gallery requires a live collection strategy, a three-pass post-event edit, and a clear delivery timeline to produce both guest keepsakes and reusable marketing assets.
| Point | Details |
|---|---|
| Sequence into four stages | Structure the gallery as Arrival, Social Middle, Peak Energy, and Soft Landing for emotional flow. |
| Three-pass edit system | Triage failures, group by moment, then select hero shots — complete passes one and two within 24–a couple of days. |
| Mobile-first presentation | Lead with a bold hero image, fast thumbnails, and a clear download button for phone viewers. |
| Privacy and consent signage | Post clear signage before guests enter the booth; keep CASL opt-in language explicit for any contact capture. |
| ZATTU PHOTO BOOTH | Offers studio-grade equipment, white-label galleries, and a managed edit-first workflow for Southwestern Ontario events. |
Why the edit-first approach produces better results
Most planners underestimate how much the curation decision affects the final product. Publishing everything feels generous, but it actually dilutes the experience. A guest scrolling through 400 raw images loses the thread of the event within seconds. A guest scrolling through 70 sequenced, well-lit hero shots feels like they’re reliving the night.
The edit-first philosophy we follow at ZATTU PHOTO BOOTH is straightforward: the camera captures everything, the editor tells the story. Studio-grade Nikon full-frame mirrorless cameras and professional lighting give us the raw material to be selective. Flat-rate pricing means clients never feel penalised for asking us to do the work properly. The result is a gallery that guests share, sponsors value, and hosts keep.
Useful sources
- Simple Booth — Photo Gallery Features: Feature reference for live feeds, QR sharing, branding, and lead capture tools used throughout this guide.
- Eventoly — Photo Booth Album Guide: Primary source for the four-stage narrative framework, three-pass editing system, and digital vs. print design guidance.
- BoothHQ — Photo Gallery Delivery Features: Reference for white-label galleries, auto-expiry, master-file separation, and password protection.
- ZATTU PHOTO BOOTH — Best Event Photo Booth Features: Provider proof points for studio-grade equipment, booth types, and service standards.
- ZATTU PHOTO BOOTH — Digital Sharing Benefits: Explains how instant digital sharing increases guest engagement and the value of branded galleries.